

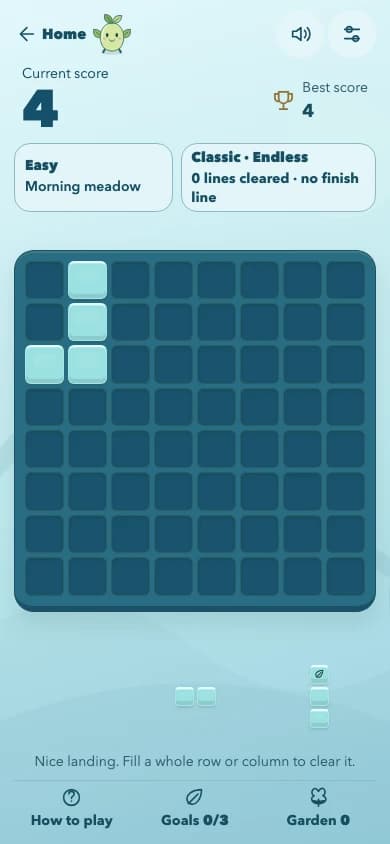
At a glance
Plan the current tray as a sequence, prioritize pieces with few legal placements, and protect connected empty space. Take a combo when the remaining pieces still fit; a bigger immediate score is not always the move that keeps the run alive.
A block puzzle can look generous until the empty cells are all in the wrong places. The useful question is not just ‘How much space is left?’ It is ‘Which shapes can still use it?’ In BlockBloom Classic, that distinction often decides whether a promising run has another move.
The strategies below are practical heuristics for this game, not a guaranteed solver. Future trays and your own placements still matter. You do not need to play quickly: the puzzle is untimed, so take the extra moment to inspect what the current hand needs.
Treat the tray as a sequence of moves
Before placing the easiest piece, locate the most constrained one. A long bar may have only one available lane. A wider shape might fit in only one corner. A single cube can have many legal positions but still be essential to the line that releases space for the large shape.
Now mentally try an order. If the large piece fits immediately, ask what its placement leaves for the others. If it does not, look for a line you can clear first. Planning means considering the clear between placements, rather than testing all three pieces against the unchanged board.
Protect a shape-friendly area
Connected space gives you options. A square opening serves different shapes from a thin corridor, even when both contain the same number of cells. Leave some width and some length instead of treating every empty cell as interchangeable.
For example, a four-cell line and a two-by-two square each use four cells. The square cannot fit in the line’s corridor. If a placement removes your last wider opening, its cost may be larger than the number of cells it occupies. You are giving up a type of future move.
Avoid turning one useful region into two isolated pockets unless the placement clears a line or resolves another concrete problem. Equally, do not preserve a perfect square at all costs when the current tray requires a different space. Adapt the reservation to what is in front of you.
Let combos follow good positions
Multi-line clears and combo feedback make Classic satisfying. They are also an invitation to overcommit. If a tempting setup requires a very specific future shape, recognize that you are making a bet rather than following a dependable plan.
Consider two illustrative options. Move A clears one line and leaves a wide open region. Move B leaves two nearly complete lines but uses your only place for the remaining square piece. Unless another move in the current tray opens that space, Move A is the more robust choice. The screenshot or score effect is not evidence that Move B was better.
This does not mean never build a larger clear. Build it when the current tray already supports the sequence, or when the setup leaves enough alternatives that a different next tray will not trap you.
Recognize the three common traps
When a run ends, look for the decision pattern rather than blaming the final shape. A short review can make your next attempt more interesting.
Compare all columns. Scroll sideways if needed.
| Habit | Why it becomes awkward | Try instead |
|---|---|---|
| Filling every small gap immediately | The flexible piece may be needed for a clearing move elsewhere | Check all current pieces first |
| Stacking several unfinished lines | Too much of the board depends on one hoped-for shape | Finish one useful line before opening another project |
| Keeping only narrow corridors | Wide shapes lose their possible landing areas | Reserve a broader connected region |
A playable tray is not an automatic win
BlockBloom’s dealer checks a route through each newly generated three-piece tray, including line clears between those placements. That says a route existed when the tray was dealt. It does not mean every order or every legal placement preserves that route.
The distinction matters when learning. A move can be valid now and still make a later piece impossible. The game does not secretly place the blocks for you, and its bounded look-ahead is not a proof that the entire future run can be won. Your choice of sequence remains the central puzzle.
Give the next run one specific purpose
Rather than trying to improve everything at once, spend one run checking the hardest piece before every move. In the next, pay attention to isolated holes. Then try combining those habits. A personal best is enjoyable, but a position you understand is a more repeatable success.
If a touch placement is difficult to judge, use the select-then-place alternative. A strategic mistake and a control mistake are different problems; solving the input problem first makes it much easier to learn from the board.
Your next move
The best-looking move is not always the best position. Keep a route for the rest of the tray, then enjoy the combo when it arrives.
Play BlockBloomSources & further reading
Checked against the website betas on 30 October 2026. Game rules and prices may change during development.
- BlockBloom Classic
The current playable rules and board used for these strategy examples.
- Our explanation of adaptive dealing
First-party description of the dealer’s guarantees and limits.

From Rewritely Games
We make BlockBloom and Humble Hustle. These first-party guides explain the games we build, including their current limits.